0
days
00
hr
00
min
00
sc
 contact@mbirrigation.co.uk


How to Winterise Your Irrigation System: UK Blowout Guide

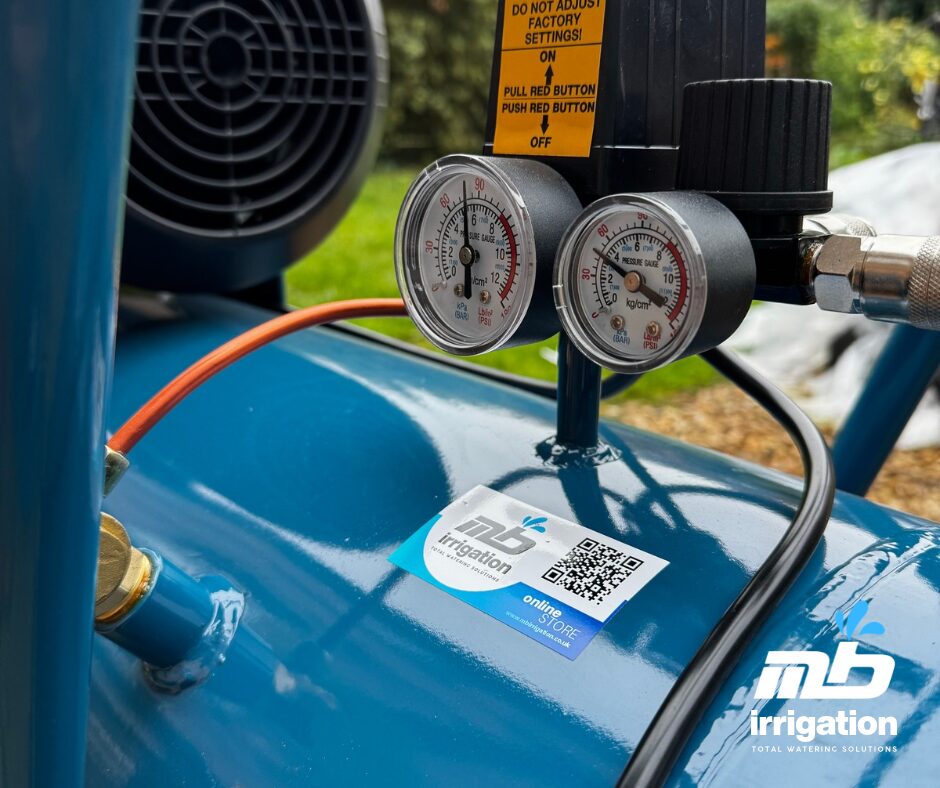
As the British autumn draws to a close and the first overnight frosts begin to settle across the UK, it is time to think about protecting your garden investments. Leaving water trapped inside your underground pipes, backflow preventers, and solenoid valves during sub-zero winter temperatures is a recipe for disaster. When water freezes, it expands with immense force, leading to cracked plastic fittings, ruptured pipelines, and costly repairs come spring.
This comprehensive guide will walk you through the essential process of irrigation winterisation, explaining when to blow out your lines, what compressor settings to use, and how to safely safeguard your pumps, valves, and controllers against the British winter.
When is the Best Time for a System Blowout?
In the UK, the ideal window for learning how to winterise your irrigation system and executing the blowout is usually between mid-October and late November, well before the ground experiences a deep, prolonged freeze. Waiting until December is a significant gamble. Even a single sharp frost can damage shallow-buried micro-drip components or exposed manifold setups.
A good rule of thumb is to perform your system blowout as soon as you clear your summer polytunnel crops and your lawn growth slows down to its final winter dormancy.
The Right Equipment: Compressor Size and CFM Requirements
The biggest mistake homeowners make when attempting a DIY blowout is using a small, high-pressure compressor designed for inflating car tyres. To purge water from irrigation lines effectively, you do not need high pressure—you need a high volume of air.
Air volume is measured in CFM (Cubic Feet per Minute). If your compressor does not provide enough volume, the air will simply ride over the top of the water inside the pipe rather than pushing it out of the sprinkler heads or drip lines.
- For Domestic Gardens & Small Greenhouses: You need a compressor capable of delivering at least 15 to 20 CFM.
- For Larger Commercial Lines (1-inch pipe or greater): A professional-grade tow-behind compressor delivering 50+ CFM is highly recommended.
Safe Pressure Settings for PE and PVC Pipes
While you need high volume (CFM), you must keep your operating pressure (Bar / PSI) tightly regulated. Excessively high pressure will overheat plastic fittings, distort sprinkler internal seals, and literally crack pipelines under the ground.
Never exceed the following maximum pressure limits during a blowout:
- • Polyethylene (PE) Flex Pipes / Drip Lines: Maximum 3.5 Bar (50 PSI)
- • Rigid PVC Pipes: Maximum 5.5 Bar (80 PSI)

*Top Tip: Always start your compressor with the pressure regulator turned down low, and gradually increase it until the zone components lift and mist.
Step-by-Step Irrigation Blowout Procedure
Before starting, ensure you wear safety goggles. Flying debris or a ruptured plastic cap can cause serious injury. Follow these essential steps to clear the lines cleanly:
- Isolate the Main Water Supply: Turn off the main isolation valve connecting your irrigation system to the mains water supply or outdoor garden tap. If your system is automated, ensure the main supply remains firmly shut throughout the entire process.
- Connect the Air Compressor: Attach the compressor hose to the blowout tee or quick-release coupling located immediately downstream of your main shut-off valve or backflow preventer. Never blow air directly through a backflow preventer assembly, as this will instantly destroy the delicate internal rubber seals.
- Activate the Farthest Zone First: Using your irrigation controller or manual valve overrides, open the zone that sits furthest away from the compressor. Never run the compressor without an irrigation zone open, as static air pressure will quickly rupture your system manifold.
- Introduce the Air Flow: Slowly open the compressor valve to let air enter the line. You will notice a mixture of water and air emerging from the sprinkler heads or drip stations. Keep the air flowing until only a fine mist or dry air exits the heads.
Crucial Warning: Avoid running dry air through a single zone for more than 1 to 2 minutes at a time. Without water acting as a lubricant, friction can cause heat damage to pop-up moving parts. - Cycle Through All Remaining Zones: Repeat the process for each individual zone, working your way closer toward the compressor station. Once a zone is fully blown out, close it completely before moving on to the next.
Protecting Specific Components: Valves, Pumps, and Controllers
Blowing out the main pipe network is only half the battle when determining how to winterise your irrigation system. Certain expensive components require individual attention to survive the UK winter frost unscathed.
1. Solenoid Valve Manifolds
Standard electric solenoid valves contain small internal chambers that can retain water even after a mainline blowout. After finishing the air blowout, manually turn the bleed screws on your valves halfway open. Leaving them slightly open allows any residual trapped moisture to expand safely without cracking the valve body casing.

2. Surface Pumps and Submersible Pumps
If your irrigation system draws from a rainwater harvesting tank, borehole, or well via a surface pump, it must be drained entirely. Unplug the pump from the mains electrical supply, open the low-point drain plugs on the pump housing to empty the internal volute chamber completely, and store the pump inside a frost-free garden shed or garage if possible.
3. Tap Timers and Controllers
Always disconnect battery-powered tap timers from your outdoor garden tap before December. Remove the batteries to prevent corrosive leaks over winter, drain any internal water, and store the unit indoors. For outdoor-mounted mains controllers, leave the unit powered on but switched to “System Off” or “Rain Delay” mode; the minor heat generated by an active internal transformer helps ward off internal condensation during freezing winter nights.
Summary Checklist for British Gardeners
By taking an hour or two to properly winterise your watering network this autumn, you ensure that your polytunnel lines, allotment drip paths, and lawn pop-ups are ready to perform perfectly when spring returns.
If you lack a high-CFM compressor or feel unsure about managing pressure levels safely, do not hesitate to contact the MB Irrigation team for expert advice, replacement fittings, or professional winterisation assistance.
If you do have your own compressor and want to tackle the job safely yourself, make sure to check out our Premium Irrigation Winterisation Blow-Out Tool. We’ve designed this thread-safe adaptor kit with a built-in shut-off valve specifically to protect your system’s plastic components during the blowout process.
Watch Our Professional Winterisation Process in Action
Want to see exactly how a trade-grade system blow-out is performed safely? We have recorded a comprehensive step-by-step video demonstration showcasing our team winterising a multi-zone layout. You can watch how we regulate high-volume airflow to purge every drop of standing moisture without putting unnecessary stress on the underlying pipe network.